Elmo HV-7000SX User Manual Page 1
Browse online or download User Manual for Projectors Elmo HV-7000SX. Elmo HV-7000SX User's Manual
- Page / 40
- Table of contents
- TROUBLESHOOTING
- BOOKMARKS
- VISUAL PRESENTER 1
- INSTRUCTION MANUAL 1
- IMPORTANT SAFEGUARDS 2
- USER-INSTALLER CAUTION 3
- BEFORE YOU USE 4
- CONTENTS 5
- 1. PART NAMES AND FUNCTIONS 7
- Front Operation Panel 8
- Rear Panel 9
- Wireless Remote Control 10
- 2. WIRELESS REMOTE CONTROL 12
- 3. MOUSE 12
- 4. SETTING UP 13
- Projector 14
- RGB input signal 15
- RGBoutput signal 15
- 2 Pausing is released 16
- RGB cable for HD-80XG 17
- DC cable (supplied) 17
- 5. OPERATION PROCEDURES 18
- Storing the Presenter 20
- 6. VARIOUS FUNCTIONS 21
- Resolution selection 22
- Color/B&W selection 25
- Posi/Nega conversion 25
- Image rotation 25
- Video pointer 26
- Enlarging the image 27
- LCD monitor bracket socket 27
- 7. OSD (On-Screen Display) 28
- Main menu 29
- Set menu 30
- 8. RS-232C SPECIFICATIONS 32
- Data format specifications 34
- Transmission specifications 35
- Connection 35
- 9. TROUBLESHOOTING HINTS 36
- 10. SPECIFICATIONS 37
- ELMO CO., LTD 40
Summary of Contents
VISUAL PRESENTERINSTRUCTION MANUALPlease read this instruction manual carefully before using this Visual Presenter and keep itfor future reference.
9Wireless Remote Control40. MENU41. POINTER42. 2X44. PAUSE46. POSI/NEGA47. COLOR/B&W50. MAIN/MODE53. TELE54. WIDE43. Directions45. IMAGE ROTATION4
10Button Name FunctionReference Page40 MENU To call the OSD (On-Screen Display) menu, and to fix the settings.41 POINTER To display the pointer on the
Connect the mouse to the mouse control terminal on the rear panel.The mouse can control the display and movement of the OSD and video pointer.Referenc
124. SETTING UP(1) Unfold the lighting unit arms fully until they come to thedeadend. Unfold arm 1 and then arm 2 as illustrated.(2) Press the column
13Connection to the monitor and the projectorNote: Be sure to turn OFF the power supply to all equipment before making any connections to protect the
14Connection of analog RGB cable1DSUB 15P shrinking terminal (Male)Presenter side(DSUB 15P)RGB input terminalunit side(BNC)Video output (Red)23Video o
15Restrictions on signal outputs (RGB, Composite video, S-video)Note: The specifications with " " are not effective.Posi/Nega selectionColor
16Connecting the Desk-Top Presenter (HD-80XG) Use the DC OUT socket of the unit to connect ELMO HD-80XG.To INPUT RGB1 or INPUT RGB2RGB cable for HD-80
175. OPERATION PROCEDURES(1) Turn ON the power switch.Notes: · Before turning ON the power switch, connection to the monitor should have been complete
18(1) Press the base button [BASE] on the front operation panel orwireless remote control. The indicator of the base button[BASE] will blink, and the
1IMPORTANT SAFEGUARDSRead Instructions All the safety andoperating instructions should be read before theappliance is operated.Retain Instructions T
19Storing the PresenterNote: The Presenter can not be stored with the LCD monitor(optional) attached. Before storing, detach the LCDmonitor (optional
206. VARIOUS FUNCTIONSLightingThe upper lighting unit for presenting material such as printedmatter and 3-D object, and the baselight for presentingtr
21Table of video-in/out terminal selectionsMic.Ext. video signal1Ext. audio signal1Mic.Ext. video signal2Ext. audio signal2Mic.Main camera video signa
22ZoomPress the zoom button [TELE] on the front operation panel orwireless remote control, and the image will gradually beenlarged.Press the zoom butt
23Front operation panelWireless remote controlThe Presenter features a one-push auto focus function. Oncefocusing is completed, the auto focus functi
24Color/B&W selectionTo present the B&W (Black&White) material such asdocuments in sharper image with no color blur on themonitor, set to
25IrisThe iris can be manually adjusted.To open the iris, press the manual iris button [OPEN]. To close the iris, press the manual iris button [CLOSE
26Enlarging the imageTo double the image.When the button [2X] on the front operation panel or wirelessremote control is pressed or the right button of
27Use the following buttons on the Mouse for each function:· Left button-----------Each time the mouse is clicked, the pointer and the menu alternatel
28FunctionTo turn ON/OFF the upper lighting unit. When the set menu is displayedfor the first time, the previous setting is maintained. When this ic
2Object and Liquid Entry Never pushobjects of any kind into this product throughopenings as they may touch dangerous voltagepoints or short-out parts
29Set menuFunctionThe white balance mode is switched among Auto/Manual/One-push. Whenthe set menu is displayed for the first time, the white balance
30FunctionThe sound volume from the microphone jack is adjusted. When the setmenu is displayed for the first time, the previous volume setting ismain
8. RS-232C SPECIFICATIONSThe Presenter can be controlled by a PC connected to the Presenter through the RS-232C terminal [RS-232C].Setting up(1) Conne
32Table of the communication commands• When the pointer is ON The pointer moves.• When the image enlargement is ON The enlarged image moves.
Note: " " in the data column means that SPACE [20H] should be transmitted twice.FunctionCommandParameterDataComments0 (VGA)1 (SVGA)2 (XGA)3
34Response data format (Visual Presenter PC)All response data are sent in the ASCII code in correspondence to the parameters in the list of operationc
35If the trouble still remains after checking the above, consult your dealer or an authorized ELMO service center.9. TROUBLESHOOTING HINTSSymptomPossi
36General10. SPECIFICATIONSItemSpecificationsPower sourcePower consumptionAC outletDC output terminalOutside dimensionsWeightInput selectionOutput ter
37CameraItemSpecificationsLensShooting speedShooting areaLimit of focus adjustmentZoomFocusingIrisImage pick-up elementTotal picture elementsEffective
38LightingSupplied accessoriesOptions· LCD monitor bracketNote: The specifications are subject to change without notice.Dimensions and weight are appr
3Use the Visual Presenter under the rated electrical conditions.Do not leave the Presenter under direct sunlight or by heaters, or the Presenter may b
WARNING:Unauthorized recording of copyrighted slide films, materials,photographs, etc. may infringe on the rights of copyright owners andbe contrary t
41. Part Names and Functions . . . . . . . . . . . . . . . . . . . . . . . . . . . . . . . . . . . . . . . . . . . . . 6Appearance. . . . . . . . . .
57. OSD (On-Screen Display) . . . . . . . . . . . . . . . . . . . . . . . . . . . . . . . . . . . . . . . . . . . . . 27Main menu . . . . . . . . . .
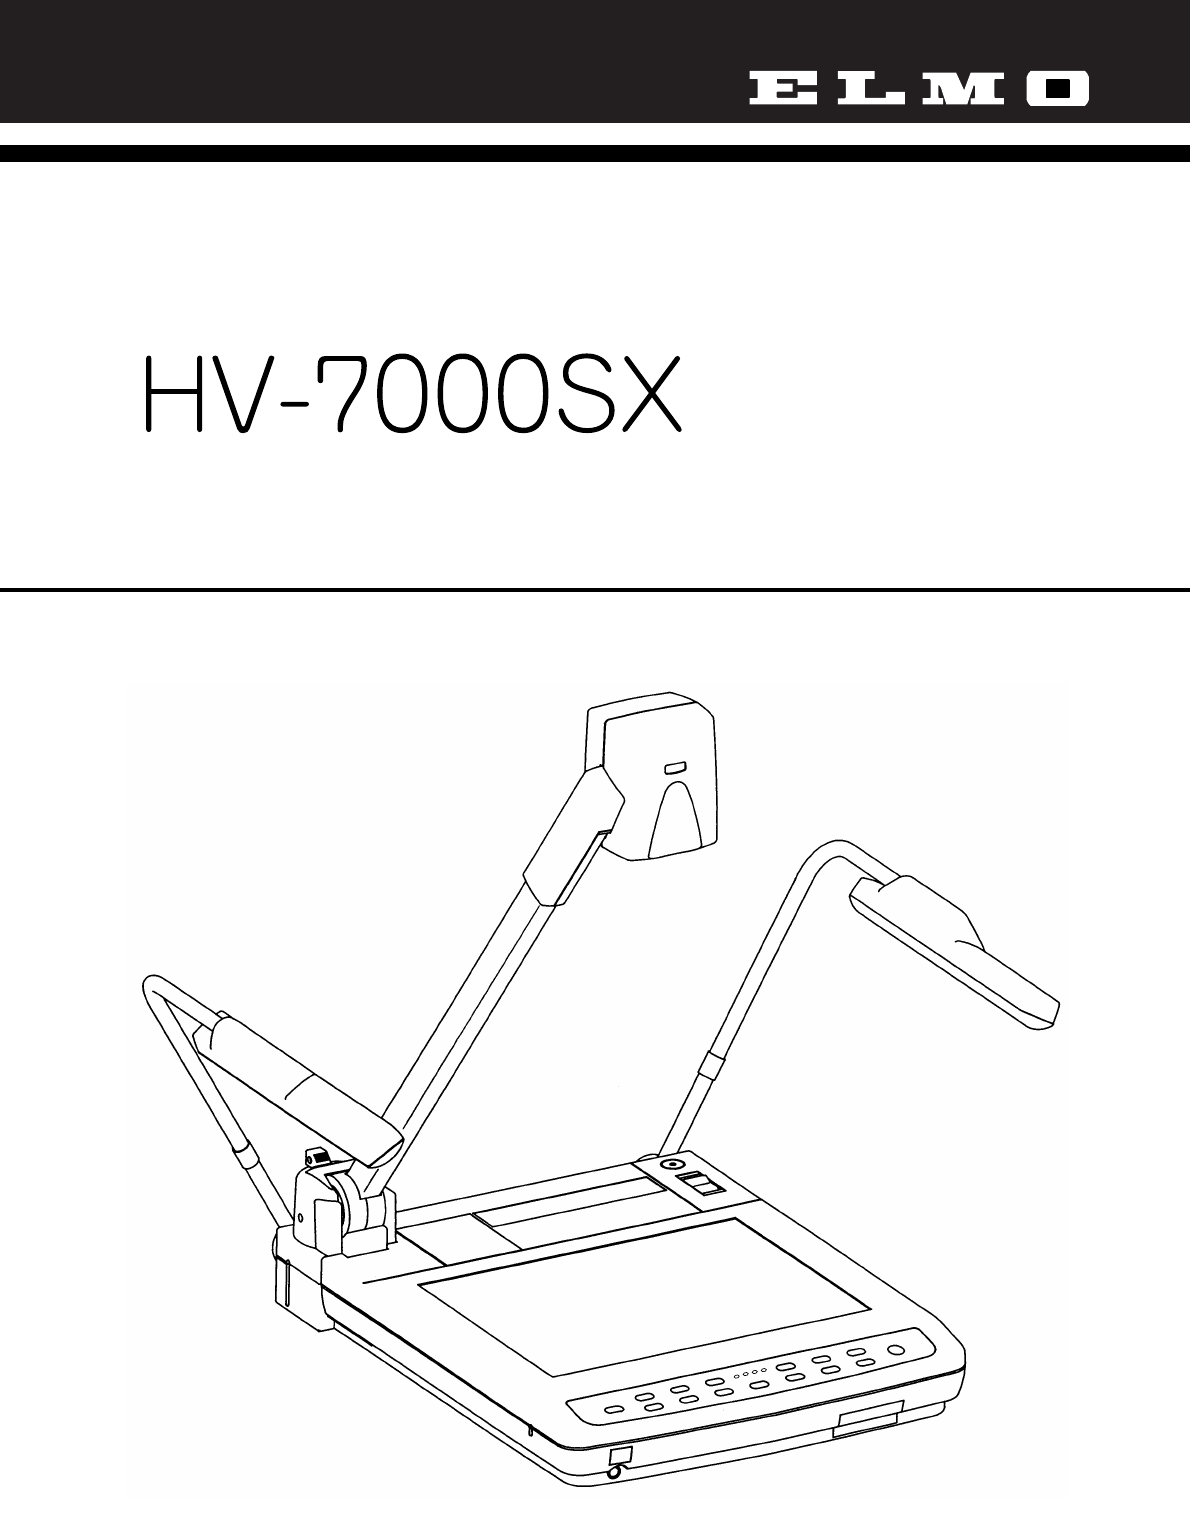
61. PART NAMES AND FUNCTIONS1. Stage2. Column3. Camera Head4. Column LockRelease Button5. Power Switch6. Lighting Unit Arm7. Lighting Unit7. Lighting
7Part Name FunctionReference Page16 Magnification Button To electronically double the image size.The image is scrolled with the direction buttons.17 L
8Rear PanelOUTPUTMOUSE CONTROLAC ININPUTRS-232COUTPUT12V 0.9AUSBRGB OUTS-VIDEORLAUDIOVIDEORGB1RGB2AUDIO(L/R)1AUDIO(L/R)226. Power CordReceptacle38.
More documents for Projectors Elmo HV-7000SX

Related products and manuals for Projectors Elmo HV-7000SX
 (4 pages)
(19 pages)
(50 pages)
(32 pages)
(16 pages)
(34 pages)
(3 pages)
(56 pages)
(56 pages)
(4 pages)
(19 pages)
(50 pages)
(32 pages)
(16 pages)
(34 pages)
(3 pages)
(56 pages)
(56 pages)
 (64 pages)
© 2020, manymanuals.com. All rights reserved. | 1.151 s |
 Manymanuals.com
 Manymanuals.de
 Manymanuals.fr
 Manymanuals.it
 Manymanuals.pl
 Manymanuals.cz
 Manymanuals.es
 Manymanuals-pt.com
Comments to this Manuals